
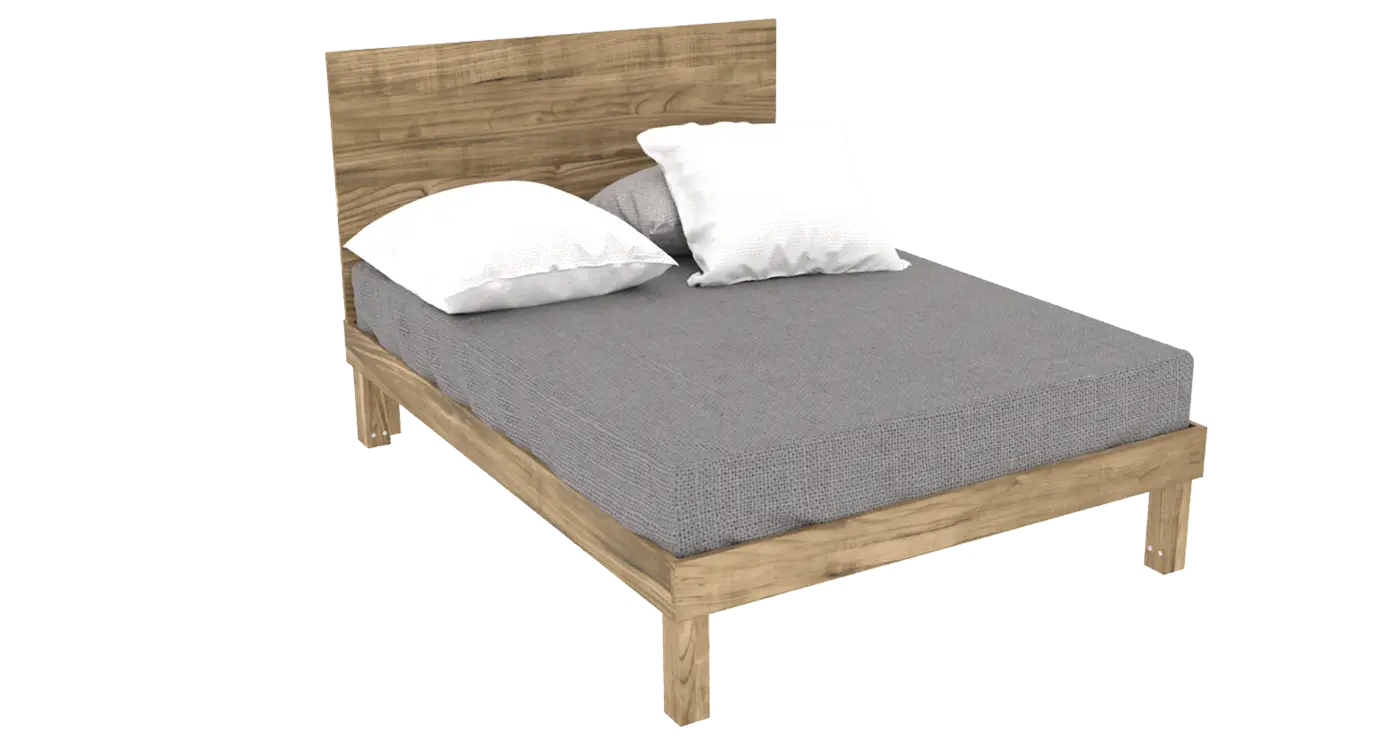
Whether you want to save money or build a piece of furniture that lasts a lifetime, this DIY Queen-size bed frame project is for you. This guide will show you how to build a rock-solid, modern platform bed using standard, budget-friendly big-box store lumber. Our proven construction method guarantees a 100% squeak-free design that won’t flex, wobble, or make a sound for years to come.
Enjoying these free plans?
If you’d like to support my work, you can get my PDF plan library with drawings and building instructions. It’s a convenient way to keep everything in one place while you build.
Learn more about supporting CraftNFix →
This plan is specifically engineered around standard US nominal lumber dimensions (like 2x4s and 1x6s), making it incredibly easy to source materials from Home Depot, Lowe’s, or any local lumberyard. With just basic woodworking tools and our comprehensive guide, even a beginner DIYer can achieve professional, showroom-quality results in a single weekend.
Watch the Full DIY Bed Frame Build Video

Lumber Shopping List & Tools Required
Before making your trip to the lumberyard, review the material specification table below. The absolute secret to this ultra-quiet bed frame is high-quality wood glue (like Titebond). To completely eliminate wood-on-wood friction, you must apply wood glue generously to every single joint before driving the screws.
| Dimensions (inch) | Dimensions (mm) | Quantity |
|---|---|---|
| 2×4 lumber 8 ft long | 38x89x2500 | 5 |
| 2×2 lumber 8 ft long | 38x38x2500 | 2 |
| 1×4 lumber 8 ft long | 19x89x2500 | 15 |
| 1×6 lumber 8 ft long | – | 9 |
| – | 19x140x2500 | 10 |
| Heavy-Duty Wood Glue | Heavy-Duty Wood Glue | 1 bottle |
| 1 1/4″ screws | 35 mm screws | 36 |
| 2″ screws | 50 mm screws | 24 |
| 2 1/2″ screws | 70mm screws | 132 |
Cut List
| Part ID | Quantity | Dimensions (inch) | Dimensions (mm) |
|---|---|---|---|
| A | 2 | 2”x4”x81 3/4” | 38x89x2039 |
| B | 1 | 2”x4”x78 3/4” | 38x89x1963 |
| C | 2 | 2”x4”x58” | 38x89x1544 |
| D | 2 | 2”x4”x14” | 38x89x354 |
| E | 2 | 2”x4”x10 1/2” | 38x89x265 |
| F | 4 | 2”x2”x14” | 38x39x354 |
| G | 12 | 2”x2”x10 1/2” | 38x39x265 |
| H | 2 | 1”x6”x82 1/2” | 19x140x2039 |
| I | 7 | 1”x6”x62 1/2” | 19x140x1658 |
| J | 2 | 1”x6”x32” | 19x89x1245 |
| K | 15 | 1”x4”x60” | 19x89x1600 |


Step-by-Step Bed Frame Assembly Guide
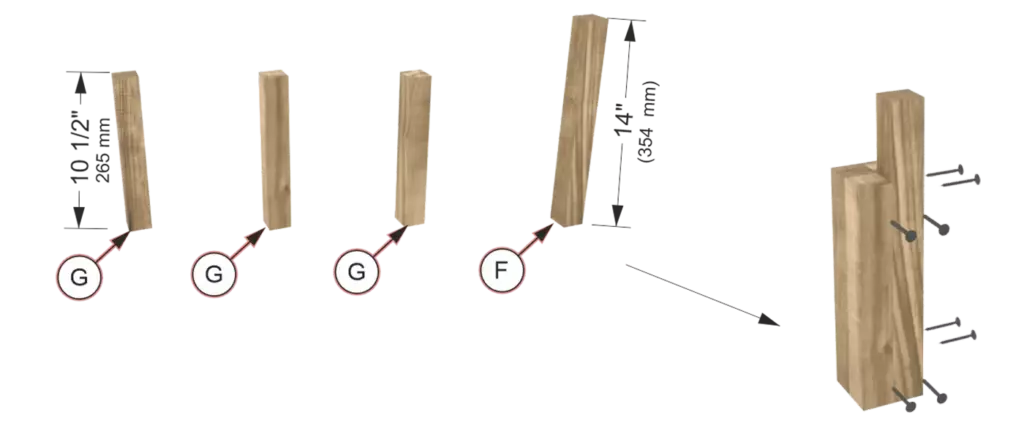
Step 1: Leg Assembly
Begin the assembly process by constructing the main bed legs. For this step, you will need 2×2 boards (38×38 mm). Combine the shorter segments (G) with the longer rear leg segment (F) as illustrated. Securely fasten the pieces together using wood screws.
⚠️ CRITICAL NOTE: To ensure a lifetime of silent use and prevent future squeaking, apply a generous amount of wood glue to all mating surfaces before fastening. Wood glue must be used at every single stage of this build.
Step 2: Main Frame Assembly
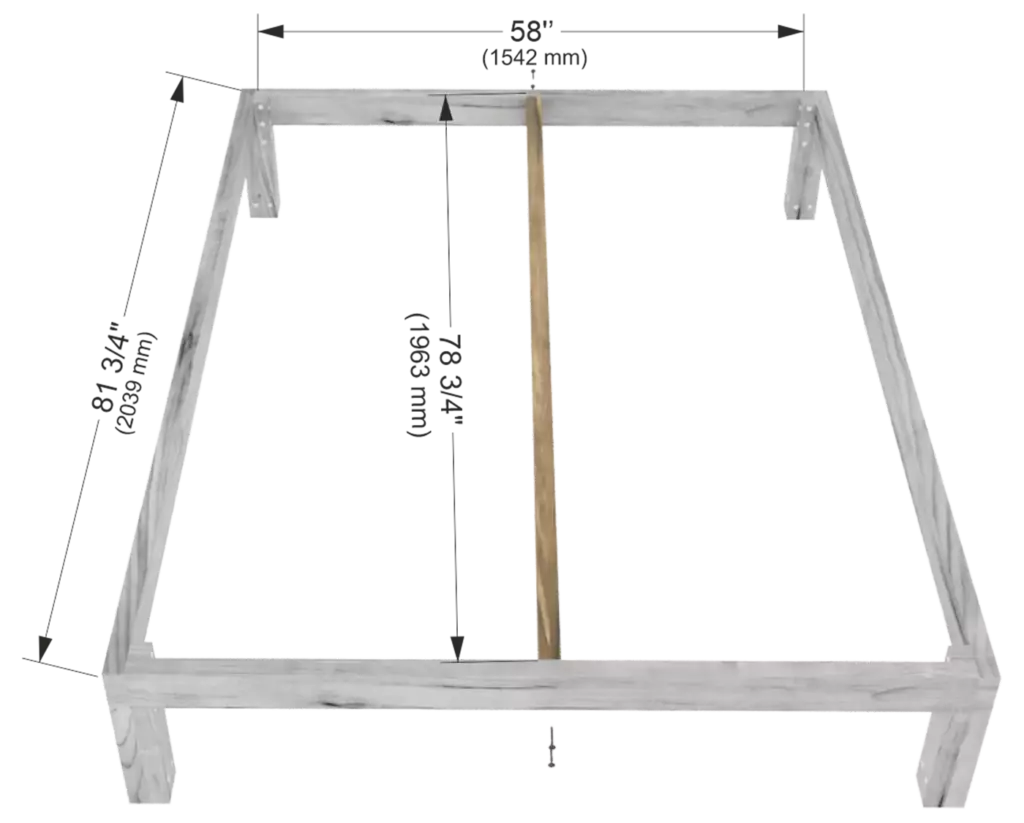
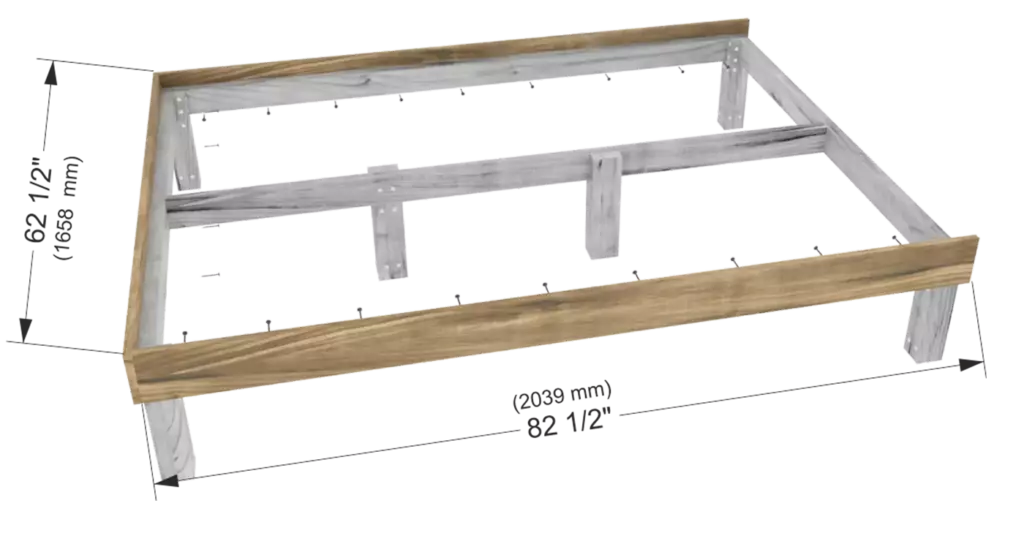
Assemble the main bed frame using 2×4 boards (38×89 mm). Connect the side rails and the crossbeams to the previously assembled legs, creating a rigid rectangular structure. Make sure all corners are square and flush.
Step 3: Center Support Legs
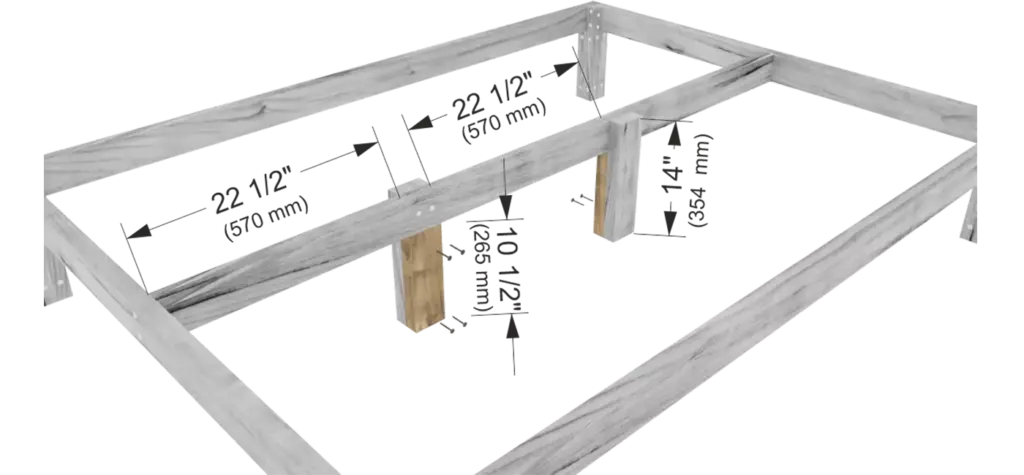
To provide heavy-duty stability and prevent sagging, install the center support legs and reinforcement blocks using 2×4 boards (38×89 mm). Space them evenly along the center rail according to the diagram dimensions.
Step 4: Exterior Trim Installation
Attach the exterior decorative boards to the frame using 1×6 lumber (19×140 mm). Install the side panels and the footboard trim directly onto the inner structural base, aligning the top edges perfectly flush.
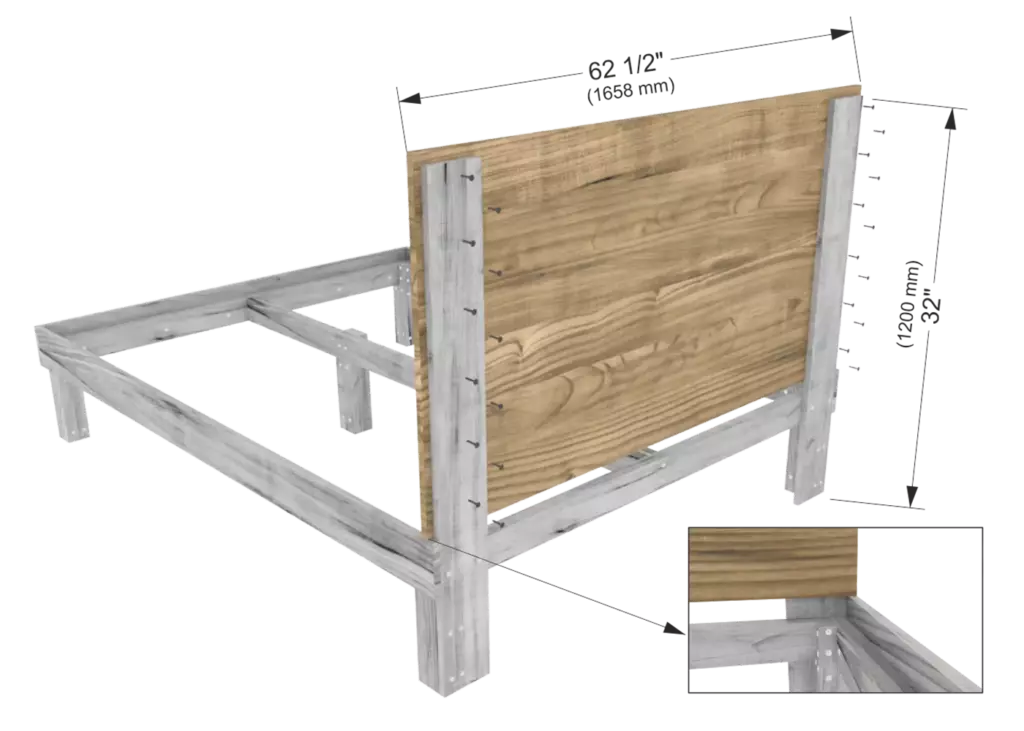
Step 5: Headboard Assembly
Construct and mount the headboard panel using 1×6 boards (19×140 mm). Install the vertical support posts to the back of the bed frame, then stack and fasten the horizontal panels starting from the frame level up.
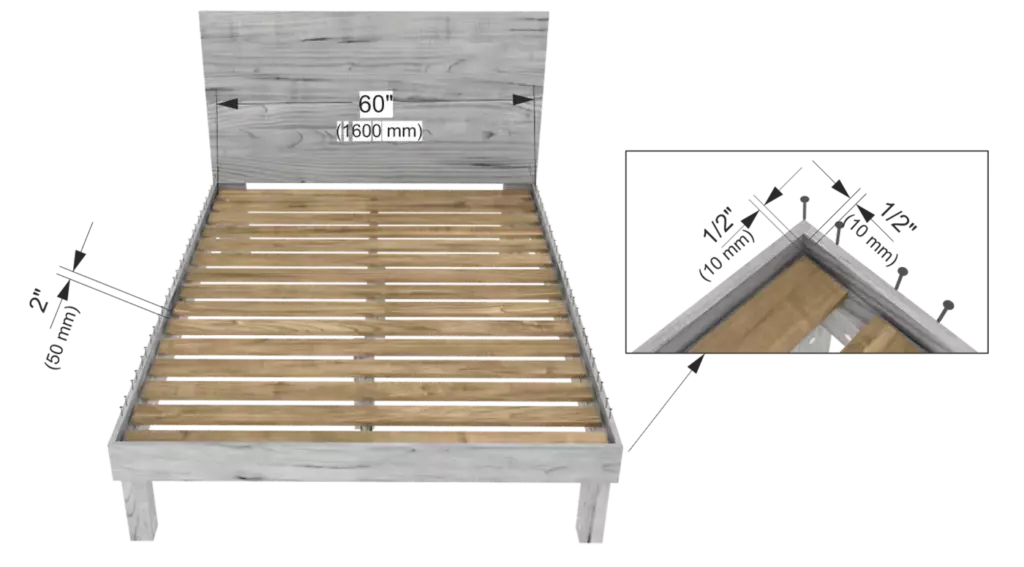
Step 6: Bed Slats Installation
Lay down the mattress foundation slats across the frame support rails using 1×4 boards (19×89 mm). Space the slats evenly with a 2″ (50 mm) gap between each board, maintaining a 1/2″ (10 mm) setback from the inner frame walls.
Final Thoughts & Wrap-Up
Building your own heavy-duty bed frame is a rewarding project that offers unmatched durability compared to cheap, mass-produced store furniture. By following our step-by-step PDF blueprint and ensuring that every single joint is glued and screwed properly, you will end up with a beautiful, heirloom-quality bed. Download the PDF, head to your local home improvement center, and let’s start building!