
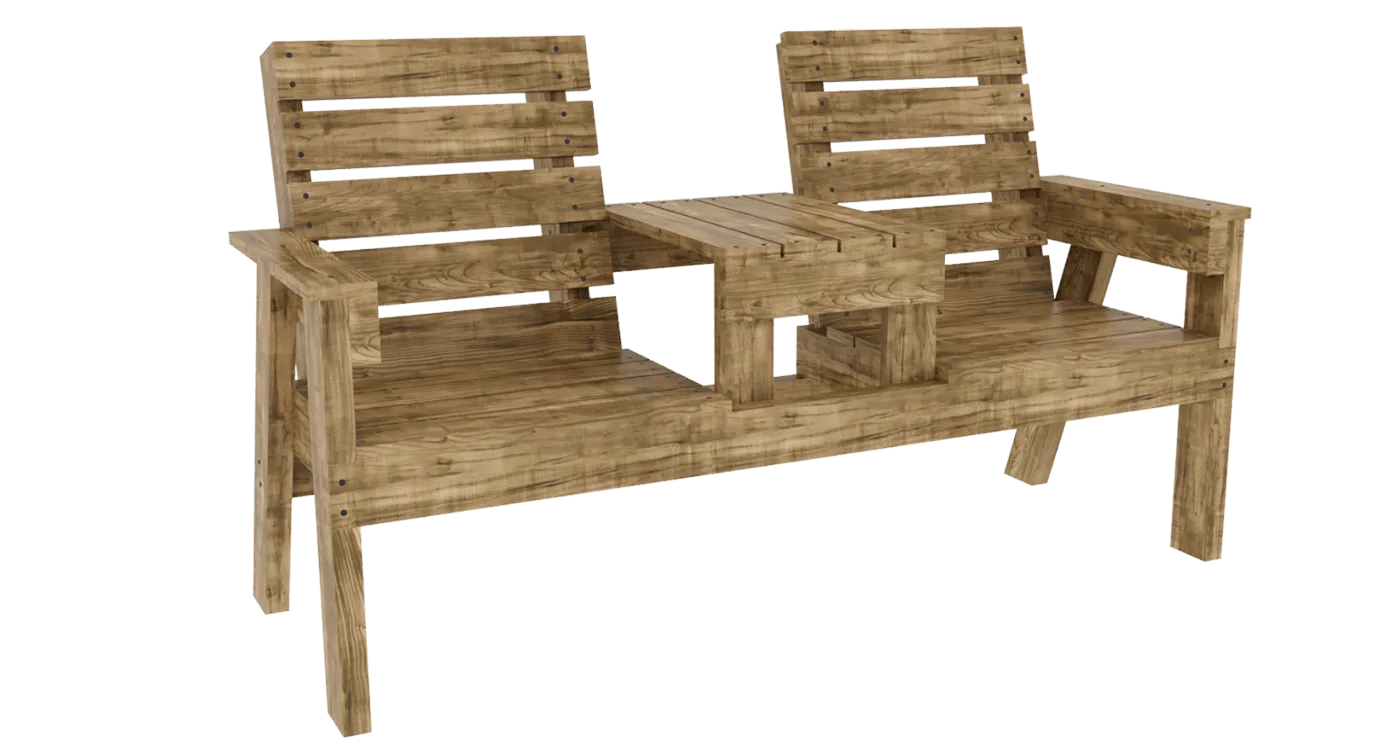
Looking for the perfect woodworking project to upgrade your backyard, patio, or porch? This free double chair bench with table plans (often called a Jack and Jill bench or a buddy bench) is exactly what you need. Combining comfortable seating for two with a functional built-in center table, this classic outdoor furniture piece provides the ultimate spot for your morning coffee or evening relaxation.
Enjoying these free plans?
If you’d like to support my work, you can get my PDF plan library with drawings and building instructions. It’s a convenient way to keep everything in one place while you build.
Learn more about supporting CraftNFix →
We have broken down the entire construction process into an easy-to-follow, 14-step DIY assembly guide. Whether you are a seasoned woodworker or a weekend DIY enthusiast, our clear 3D diagrams, precise measurements, and step-by-step illustrations will guide you from the first cut list to the final screw.
Below you will find the complete material list, cutting diagram, and detailed assembly instructions to build your own durable and beautiful wooden love seat with a center table. Let’s get started!
Watch the 3D Assembly Animation Video

Materials List
| Dimensions (inch) | Dimensions (mm) | Quantity |
|---|---|---|
| 2×4 lumber 8 ft long | 40x100x2500 | 5 |
| 1×4 lumber 8 ft long | 20x90x2500 | 6 |
| 2 1/2″ screws | 70mm screws | 1 Pack |
| 1 1/4″ screws | 30mm screws | 1 Pack |
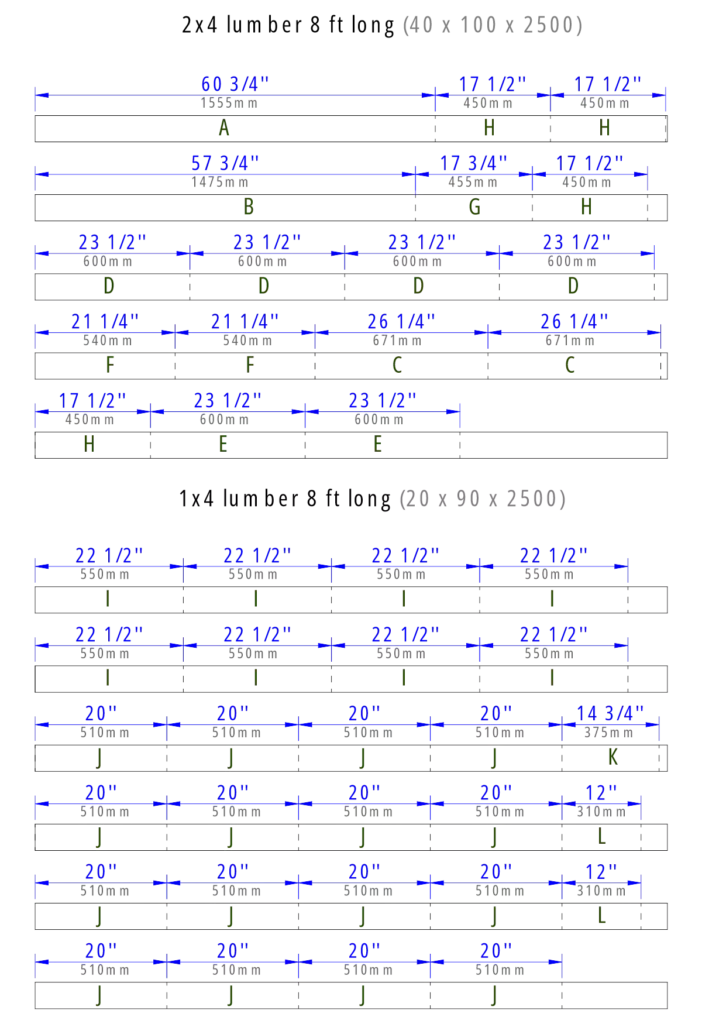
Cut List
| Part ID | Quantity | Dimensions (inch) | Dimensions (mm) | Notes |
|---|---|---|---|---|
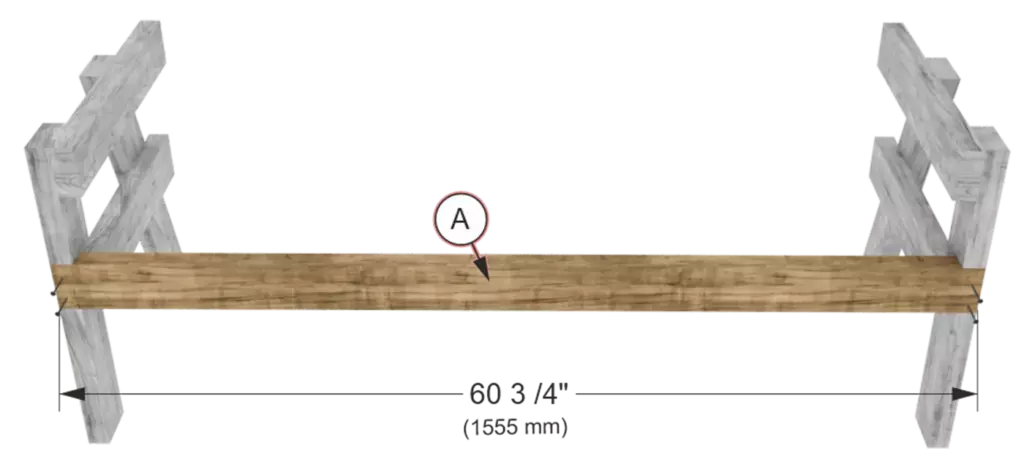
| A | 1 | 2”x4”x60 3/4” | 40x100x1555 | Front Support |
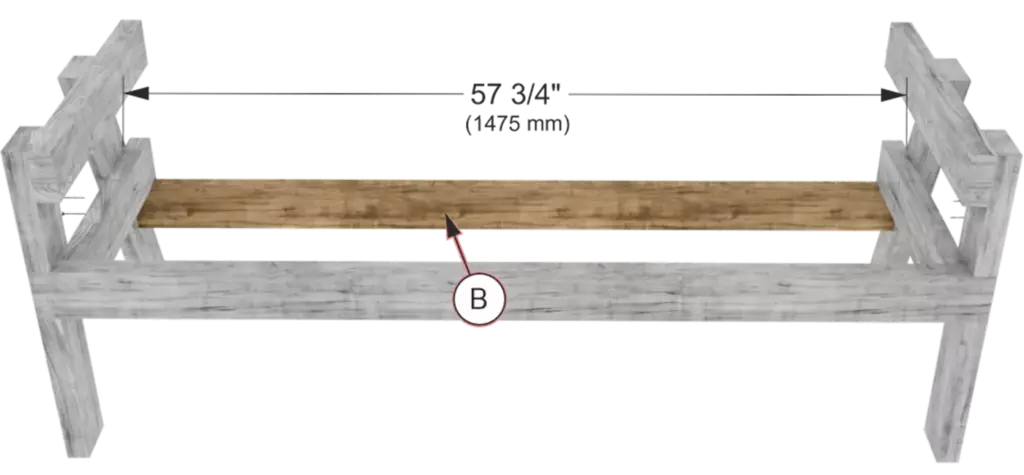
| B | 1 | 2”x4”x57 3/4” | 40x100x1475 | Rear Support |
| C | 2 | 2”x4”x26 1/4” | 40x100x671 | Rear Legs |
| D | 4 | 2”x4”x23 1/2” | 40x100x600 | Supports |
| E | 2 | 2”x4”x23 1/2” | 40x100x600 | Front Legs |
| F | 2 | 2”x4”x21 1/4” | 40x100x540 | Arm rest supports |
| G | 1 | 2”x4”x17 3/4” | 40x100x455 | Table supports |
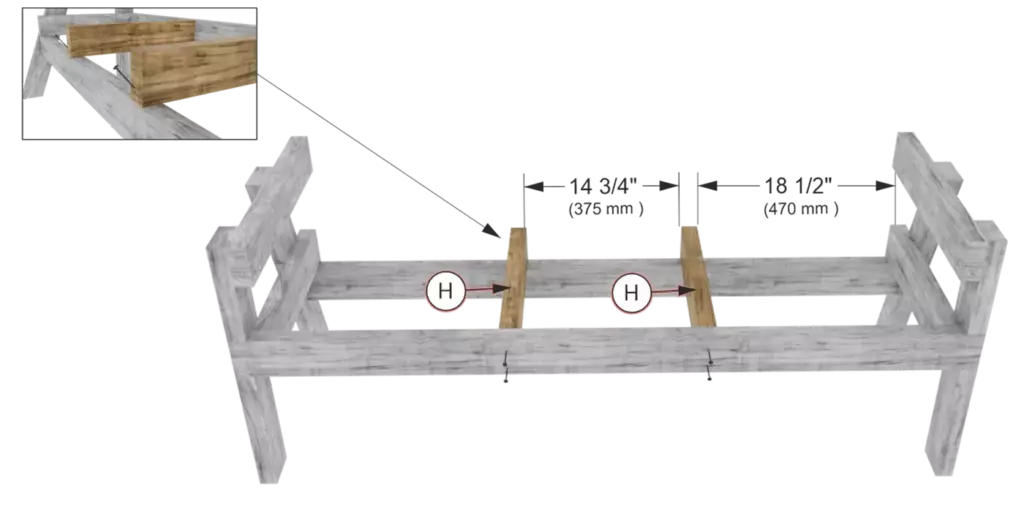
| H | 4 | 2”x4”x17 1/2” | 40x100x450 | Cross Supports |
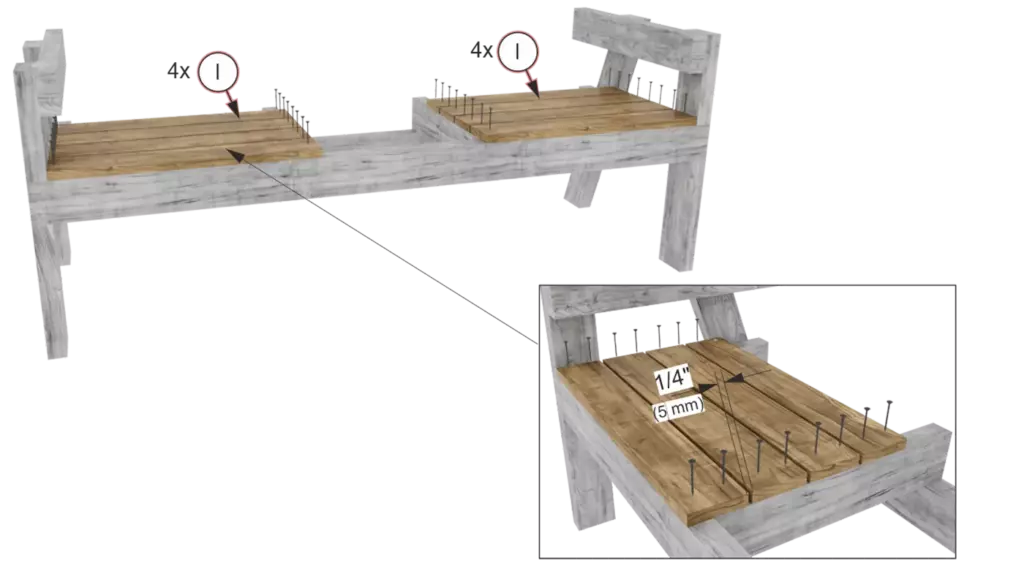
| I | 8 | 1”x4”x22 1/2” | 20x90x550 | Slats for chair seat |
| J | 16 | 1”x4”x20” | 20x90x510 | Slats for backrest / table |
| K | 1 | 1”x4”x14 3/4” | 20x90x375 | Table supports |
| L | 2 | 1”x4”x12” | 20x90x310 | Table supports |
Step-by-Step Assembly Instructions
Follow these 14 detailed steps to construct your double chair bench.
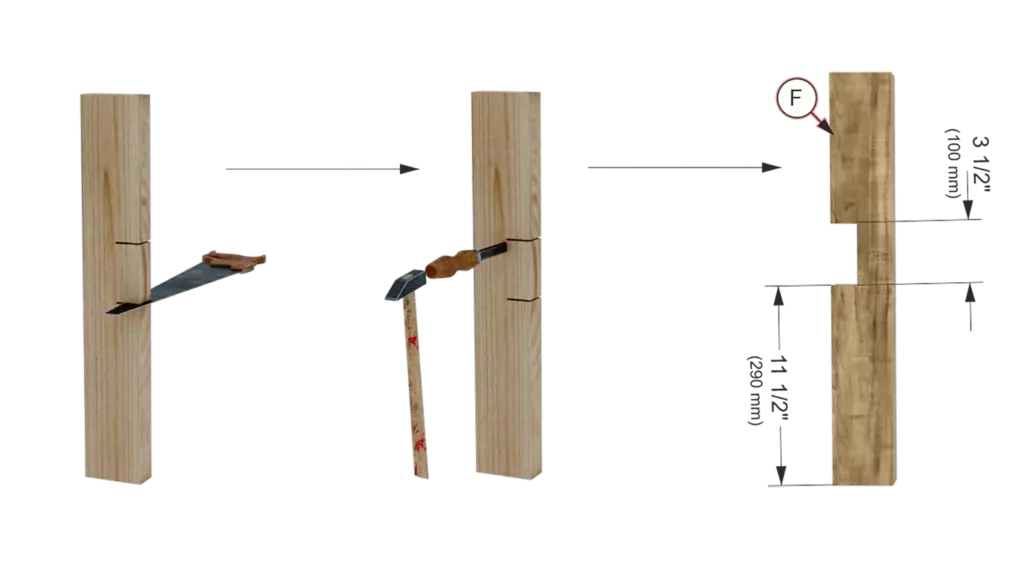
Step 1
Make the saw cuts, then use a chisel to clean out the notch for the horizontal beam.
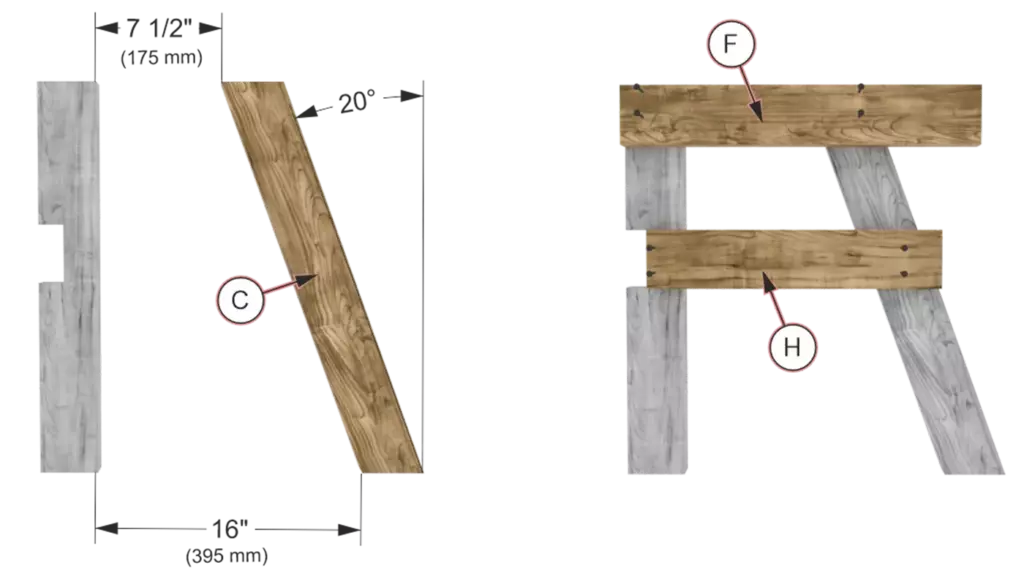
Step 2
Use 2-1/2″ (70mm) screws to secure the beams together.
Step 3
Attach front support beam (A) to the frame using 2-1/2″ (70mm) screws.
Step 4
Install the rear support (B) beam in the same manner using 2-1/2″ (70mm) screws.
Step 5
Attach the cross supports to the front and rear support beams using 2-1/2″ (70mm) screws.
Step 6
Attach the seat slats using 1-1/4″ (30mm) screws, leaving a 1/4″ (5mm) gap between the boards.
Step 7
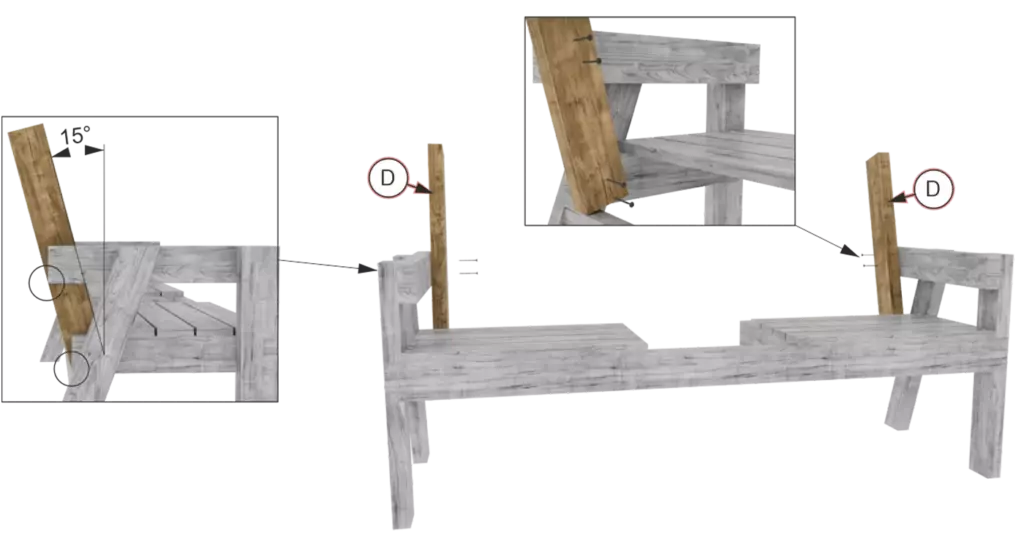
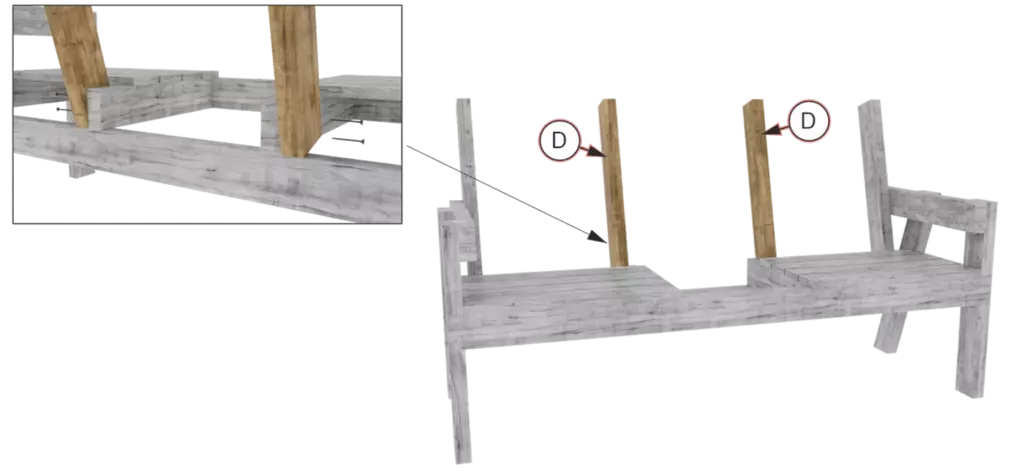
Attach the backrest supports using 2-1/2″ (70mm) screws.
Step 8
Attach the backrest supports using 2-1/2″ (70mm) screws.
Step 9
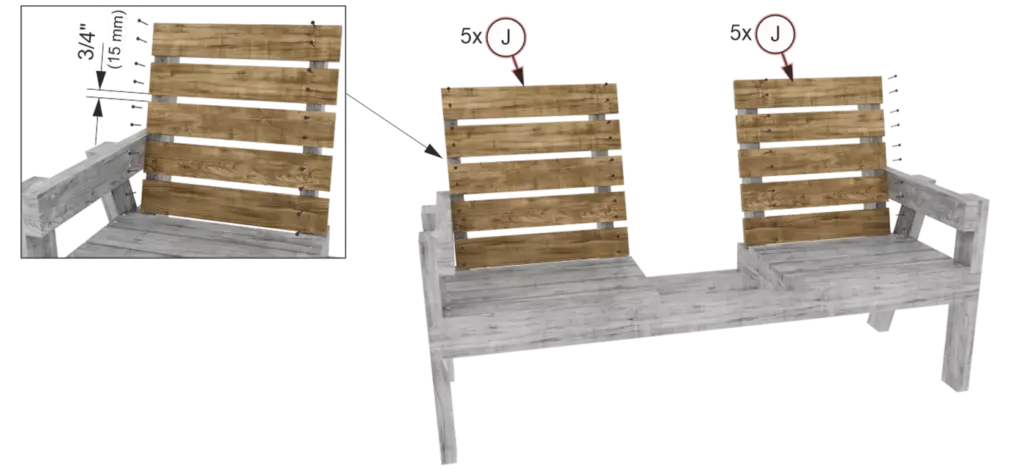
Attach the backrest slats using 1-1/4″ (30mm) screws, leaving a 3/4″ (15mm) gap between the boards.
Step 10
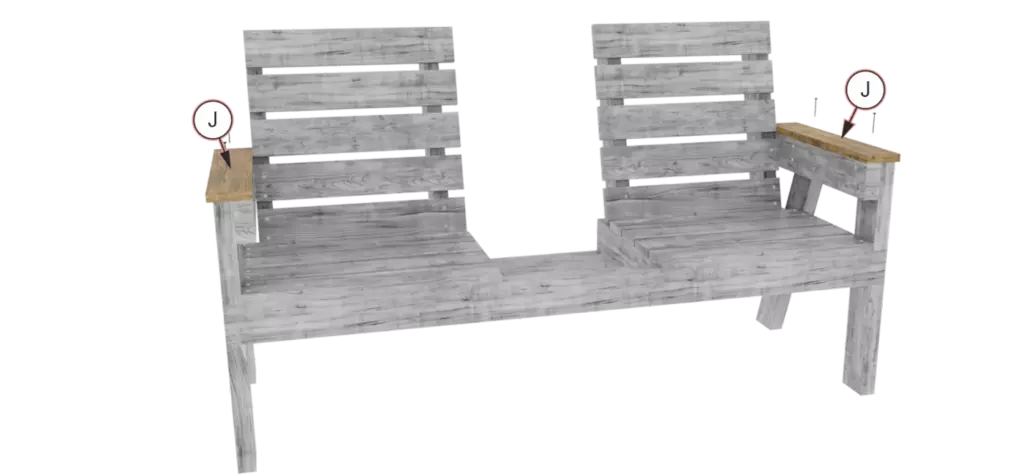
Attach the armrests in the same manner using 1-1/4″ (30mm) screws.
Step 11
Attach the table base using 2-1/2″ (70mm) screws.
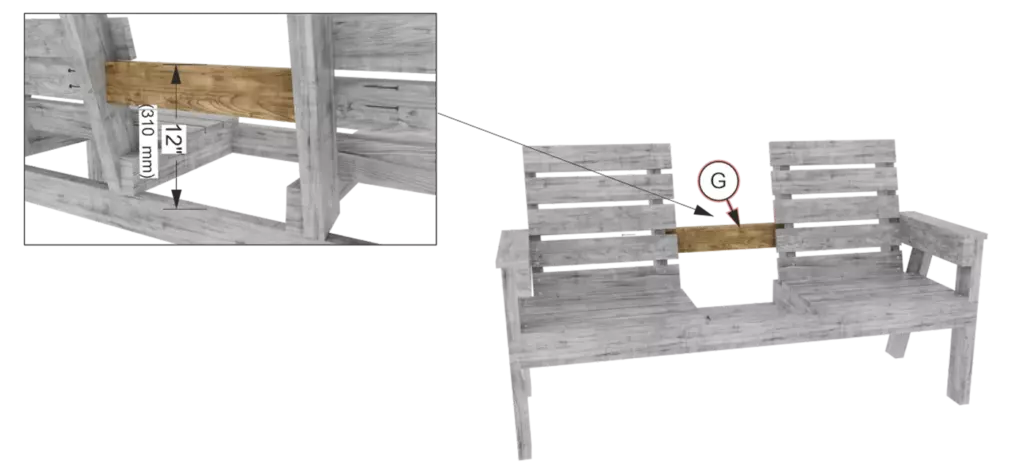
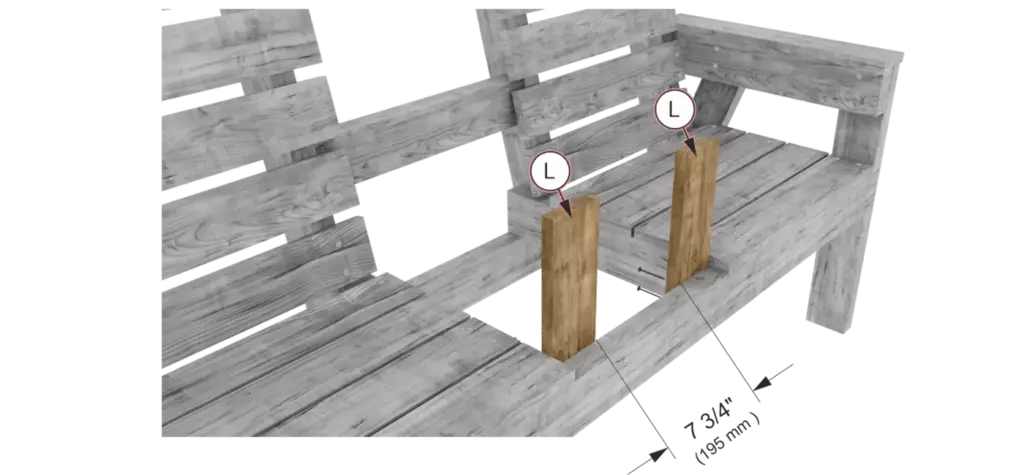
Step 12
Install the table supports in the same manner, but use 1-1/4″ (30mm) screws.
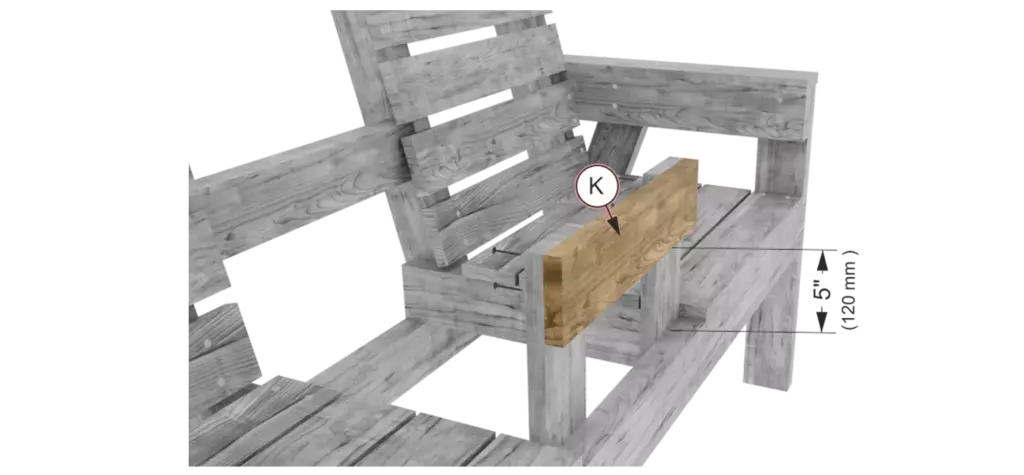
Step 13
Next, attach the table base onto the supports using 1-1/4″ (30mm) screws.
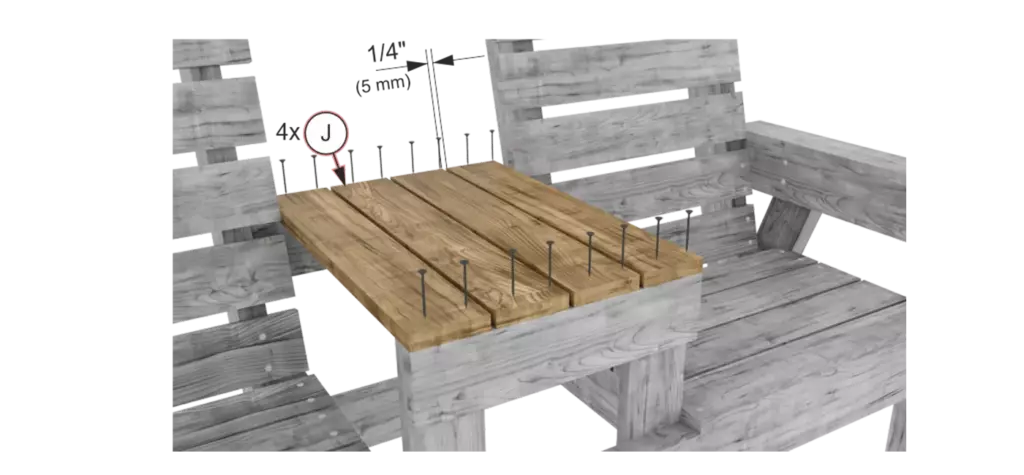
Step 14
Attach the tabletop boards using 1-1/4″ (30mm) screws, leaving a 1/4″ (5mm) gap between them.
Download Printable PDF Blueprints & Material Lists
Want to take these plans straight to your garage or workshop? Download the premium, ad-free printable PDF version. It includes high-resolution 3D diagrams, a comprehensive shopping list, and an optimized wood cutting layout to minimize waste.